Easy No-Knead Bread Recipe – Fast & Delicious Homemade Loaf
Quick And Easy No-Knead Bread is the culinary magic wand you’ve been waiting for! Have you ever dreamt of the comforting aroma of freshly baked bread wafting through your kitchen, but dreaded the time-consuming process of kneading? This recipe is your answer. It’s the perfect gateway for begin extractner bakers, delivering a crusty, airy loaf with minimal effort. What makes this Quick And Easy No-Knead Bread so beloved? It’s the incredible payoff for such little work. The slow, patient rise does all the heavy lifting, developing deep flavors and a beautiful, open crum extractb that rivals artisanal bakergin extract. Imagine tearing into a warm slice, slathered with butter, knowing you created this masterpiece with just a few simple ingredients and a whole lot of patience – the easiest kind of patience, because the dough does the rest!
Ingredients:
- 3 cups bread flour
- 1 packet (2 teaspoons) rapid rise yeast
- 1 ½ teaspoons salt
- 1 ½ cups warm water
Getting Started: The Dough
The beauty of this Quick And Easy No-Knead Bread recipe lies in its simplicity. You won’t be spending ages kneading; in fact, you won’t be kneading at all! This method relies on time and the magic of yeast to develop gluten, resulting in a wonderfully airy and chewy crum extractb. First things first, gather all your ingredients. Having everything measured out and ready to go will make the process smooth and enjoyable. For the water, aim for a temperature that feels comfortably warm to the touch – think bathwater for a baby, around 105-115°F (40-46°C). This temperature is crucial for activating the yeast properly. Too hot and you’ll kill it; too cool and it won’t get going.
In a large mixing bowl, combine the 3 cups of bread flour and 1 ½ teaspoons of salt. Give these dry ingredients a quick whisk together to ensure the salt is evenly distributed throughout the flour. This is important for consistent flavor and texture in your final loaf. Next, add the 1 packet (which is approximately 2 teaspoons) of rapid rise yeast directly into the flour mixture. Rapid rise yeast, also known as instant yeast, is designed to work quickly, which is perfect for a no-knead recipe like this. Stir everything together again, just to make sure the yeast is incorporated.
Now, it’s time to add the wet ingredient. Pour the 1 ½ cups of warm water into the bowl with the dry ingredients. Using a wooden spoon or a sturdy spatula, begin extract to mix everything together. Don’t worry about being too precise here; just aim to bring all the flour together with the water until a shaggy, sticky dough forms. It will look quite wet and unappealing at this stage, and that’s perfectly normal. The key is to ensure there are no dry pockets of flour left. Scrape down the sides of the bowl to incorporate any rogue bits of flour.
The Long Rest: Fermentation
Once your dough has come together into a cohesive, albeit sticky, mass, cover the bowl tightly with plastic wrap or a damp kitchen towel. Place the bowl in a warm, draft-free spot. This could be on your counter if your kitchen is generally warm, or in a slightly warmed oven (turned off, of course) or even near a sunny window. The rapid rise yeast needs warmth to do its work.
Now, the magic happens. Let the dough rest for at least 12 to 18 hours. Yes, you read that right! This extended resting period is where the gluten develops without any physical kneading. During this time, the yeast will consume sugars in the flour, producing carbon dioxide gas, which will cause the dough to rise and become beautifully bubbly. You’ll notice a significant increase in volume, and the dough will become airy and less sticky. For the best flavor and texture, aim for the longer end of this time range. If you’re making the dough in the morning, it will be ready for baking in the evening or the next morning. This passive fermentation is what gives no-knead bread its characteristirum extractpen crumb structure and incredible flavor.
Shaping and Second Rise
After the long fermentation period, your dough will be significantly puffed up and covered in a web of bubbles. Gently uncover the bowl. At this point, the dough will still be quite soft and sticky, but much more manageable than it was initially. Lightly flour a clean work surface – I like to use a little extra bread flour for this. Carefully turn the dough out onto the floured surface. The dough will likely spread out a bit, and that’s fine.
Now, you need to give it a gentle shape. You can do this by lightly folding the edges of the dough towards the center, creating a rough ball or boule. The goal is not to develop tension like you would with traditional bread dough, but simply to create a somewhat cohesive shape that will hold its form during the final rise and baking. Avoid overworking or aggressively pushing down the dough, as this will deflate all the lovely air pockets you’ve worked so hard to create.
Once you have your loosely shaped loaf, you’ll need to let it have a second, shorter rise. You can do this in a couple of ways. The easiest is to place the shaped dough, seam-side down, onto a piece of parchment paper. Then, cover the dough loosely with plastic wrap or a clean kitchen towel and let it rest for another 30 to 60 minutes. This final rise allows the dough to relax and puff up a bit more before hitting the heat.
Baking to Perfection
This recipe calls for baking in a preheated Dutch oven, which is key to achieving that coveted crispy crust. About 30 minutes before your second rise is complete, place a 4-6 quart Dutch oven (with its lid on) into your oven and preheat it to 450°F (230°C). The cast iron of the Dutch oven will get incredibly hot, creating a steamy environment inside when you add the dough, which is essential for a great crust.
Once the oven and Dutch oven are fully preheated, and your dough has completed its second rise, carefully remove the hot Dutch oven from the oven. Be extremely cautious, as it will be very hot! Remove the lid. Using the parchment paper as a sling, carefully lower the dough into the preheated Dutch oven. The parchment paper will make it easy to transfer and prevent sticking. Place the lid back on the Dutch oven.
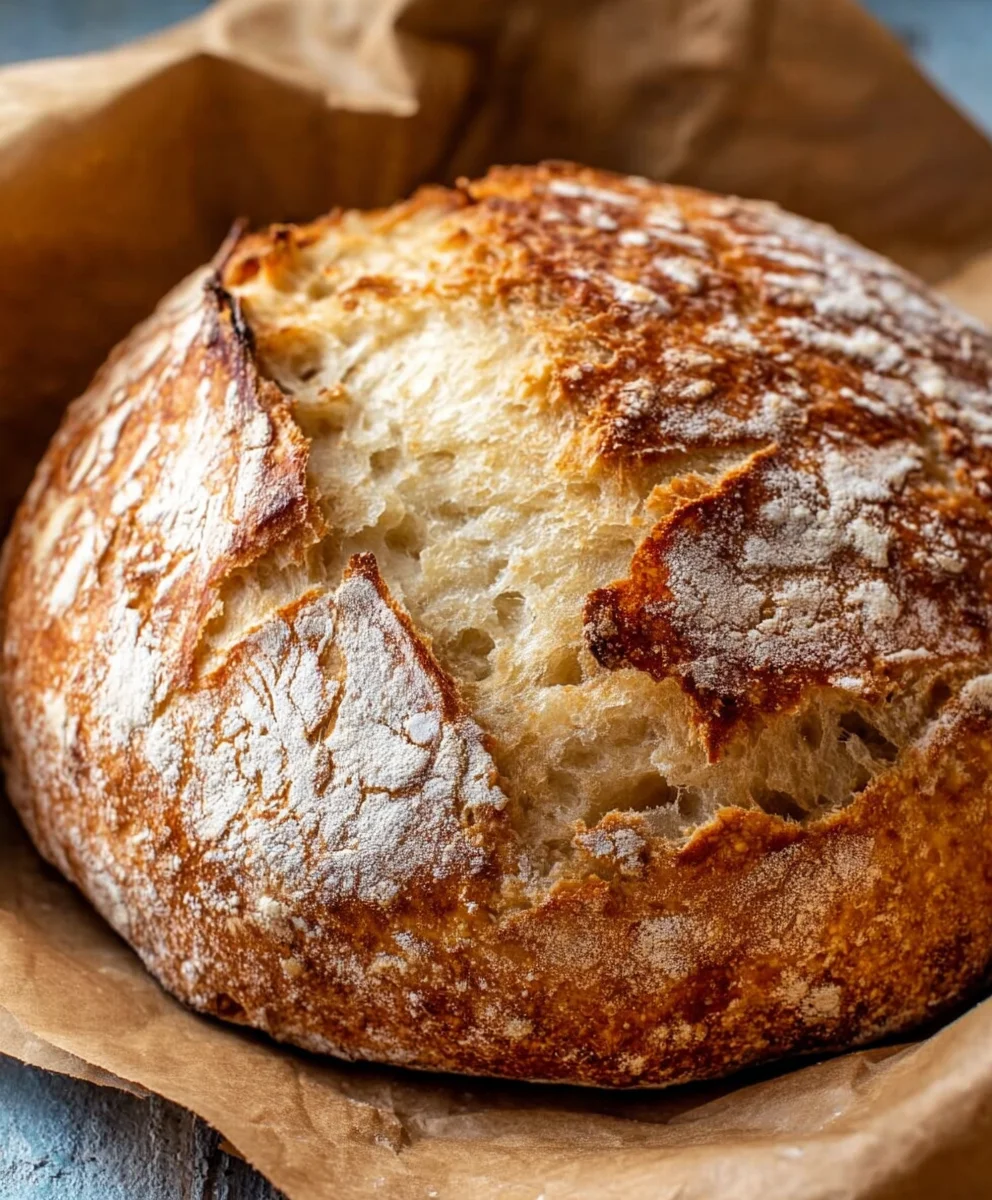
Return the covered Dutch oven to the hot oven. Bake for 30 minutes. After 30 minutes, carefully remove the lid from the Dutch oven. The bread will have risen significantly and will likely be a pnon-alcoholic ale golden color. Continue to bake for another 15 to 20 minutes, uncovered, or until the crust is a deep golden brown and the internal temperature of the bread reaches around 200-210°F (93-99°C) when tested with an instant-read thermometer. This final uncovered baking period is what develops that beautiful, crackly crust.
Cooling and Enjoying
Once the bread is baked to perfection, carefully remove the Dutch oven from the oven. Using oven mitts, lift the bread out of the Dutch oven (again, using the parchment paper is helpful) and transfer it to a wire rack to cool completely. This step is incredibly important! Resist the urge to slice into your warm loaf immediately. Cooling on a wire rack allows steam to escape from the bread, preventing a gummy interior and ensuring the crust stays nice and crispy. Let it cool for at least 1-2 hours before slicing. This Quick And Easy No-Knead Bread is fantastic served warm with butter, or used for sandwiches, toast, or dipping into soups and stews.
Conclusion:
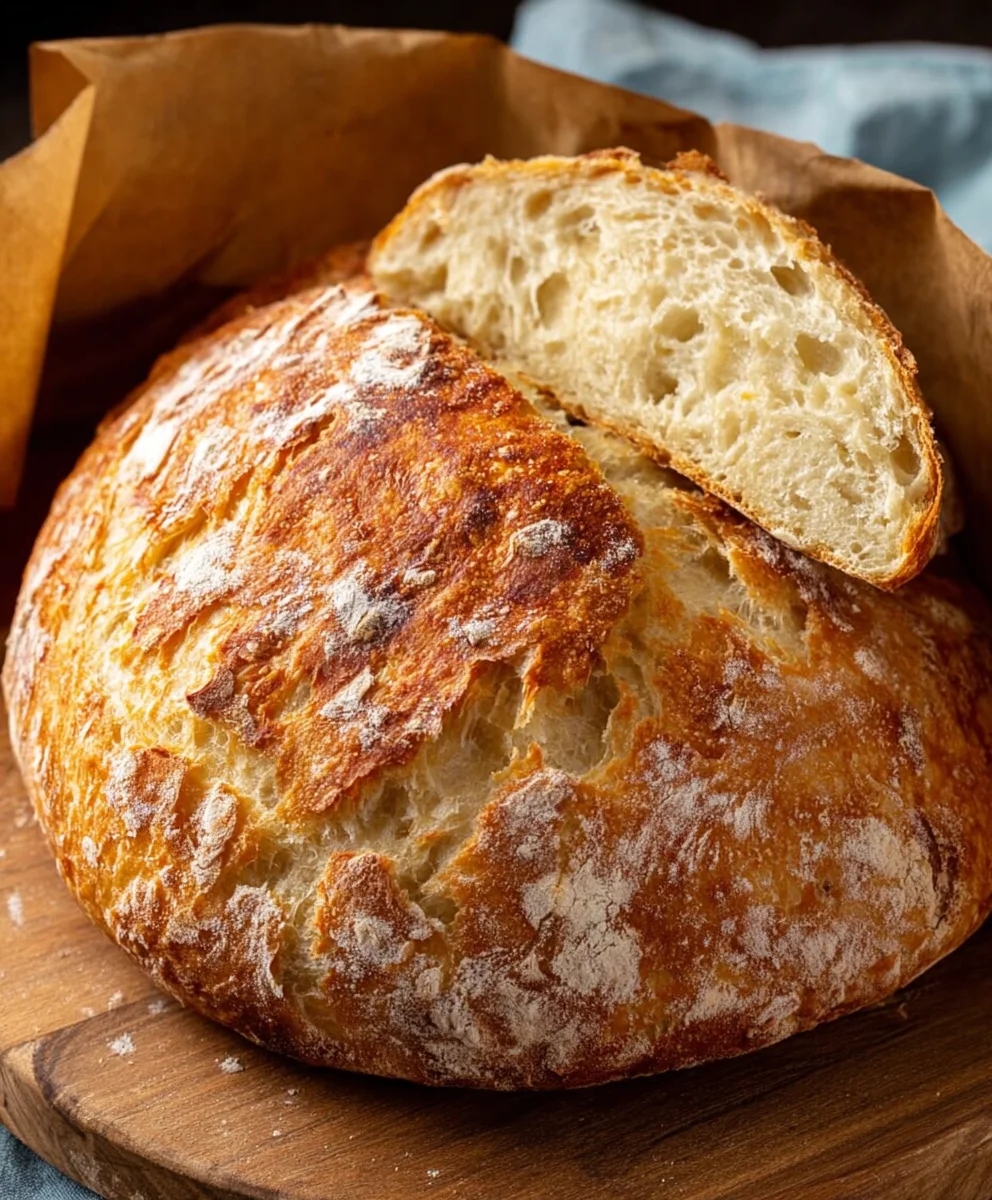
And there you have it – your guide to creating a delightful loaf of Quick And Easy No-Knead Bread! This recipe truly lives up to its name, offering a hands-off approach to homemade bread that results in a beautifully rustic, crusty exterior and a wonderfully soft, airy interior. It’s incredibly satisfying to pull a warm, fragrant loaf from your oven, knowing it required minimal effort. Don’t be intimidated by the simplicity; the results are consistently impressive.
I love serving this Quick And Easy No-Knead Bread warm, sliced thickly and slathered with good quality butter. It’s also fantastic alongside soups, stews, or pasta dishes, or used to make the most amazing grilled cheese sandwiches. Feel free to experiment with variations! You can add herbs like rosemary or thyme to the dough, sprinkle seeds on top before baking, or even mix in a handful of grated cheese for a savory twist.
The beauty of this recipe is its adaptability. So go ahead, give it a try! I’m confident you’ll be delighted with how simple and rewarding it is to bake your own delicious bread. Happy baking!
Frequently Asked Questions about Quick And Easy No-Knead Bread:
Q: My dough seems very wet, is that normal?
A: Yes, the dough for Quick And Easy No-Knead Bread is intentionally very wet and shaggy. This high hydration is what allows for the great crum extractb structure without any kneading. Don’t be tempted to add too much extra flour, as this can make the bread dense.
Q: Can I make this bread ahead of time?
A: Absolutely! The dough can be refrigerated for up to 3 days after its initial rise. This slow fermentation actually develops even more flavor. Just bring it to room temperature for about an hour before shaping and baking.
Q: What kind of pot should I use for baking?
A: A Dutch oven is highly recommended as it creates a steamy environment that helps the bread rise and develop a fantastic crust. Make sure your Dutch oven is oven-safe and can withstand high temperatures.
Easy No-Knead Bread Recipe – Fast & Delicious Homemade Loaf
A simple and quick no-knead bread recipe for a delicious homemade loaf with a wonderfully airy and chewy crust. Perfect for beginners!
Ingredients
-
3 cups bread flour
-
1 packet (2 teaspoons) rapid rise yeast
-
1 ½ teaspoons salt
-
1 ½ cups warm water (105-115°F)
-
Extra bread flour for dusting
Instructions
-
Step 1
In a large mixing bowl, whisk together 3 cups of bread flour and 1 ½ teaspoons of salt. Add 1 packet (approx. 2 teaspoons) of rapid rise yeast and stir to combine. Pour in 1 ½ cups of warm water (105-115°F) and mix with a wooden spoon or spatula until a shaggy, sticky dough forms with no dry flour pockets. -
Step 2
Cover the bowl tightly with plastic wrap or a damp kitchen towel. Let the dough rest in a warm, draft-free spot for 12 to 18 hours. The dough will rise significantly and become airy. -
Step 3
Lightly flour a clean work surface. Gently turn the dough out and lightly fold the edges towards the center to create a rough ball or boule. Avoid overworking the dough. -
Step 4
Place the shaped dough, seam-side down, onto a piece of parchment paper. Loosely cover with plastic wrap or a kitchen towel and let it rest for another 30 to 60 minutes. -
Step 5
About 30 minutes before the second rise is complete, place a 4-6 quart Dutch oven (with lid) into your oven and preheat to 450°F (230°C). -
Step 6
Carefully remove the hot Dutch oven from the oven. Remove the lid. Using the parchment paper as a sling, carefully lower the dough into the Dutch oven. Place the lid back on. -
Step 7
Bake for 30 minutes with the lid on. Then, carefully remove the lid and bake for another 15-20 minutes, uncovered, until the crust is a deep golden brown and the internal temperature reaches 200-210°F (93-99°C). -
Step 8
Carefully remove the bread from the Dutch oven and transfer to a wire rack to cool completely for at least 1-2 hours before slicing.
Important Information
Nutrition Facts (Per Serving)
It is important to consider this information as approximate and not to use it as definitive health advice.
Allergy Information
Please check ingredients for potential allergens and consult a health professional if in doubt.