Keto Mug Cheesecake – Easy Low-Carb Dessert Recipe
Keto Cheesecake In a Mug is the ultimate dessert indulgence, and I’m about to share a recipe that will make your taste buds sing! Are you craving that creamy, tangy, melt-in-your-mouth goodness of cheesecake but sticking to your low-carb lifestyle? I get it! That’s precisely why this incredibly simple Keto Cheesecake In a Mug recipe is a game-changer. Forget complicated crusts and long baking times. This is your instant gratification, single-serving solution to satisfy those sweet cravings. It’s astonishingly easy to whip up, requires minimal ingredients, and bakes in mere minutes, making it perfect for those moments when only cheesecake will do. You’ll love how it delivers all the rich, decadent flavor you expect from traditional cheesecake, without the carb overload.
Why You’ll Adore This Mug Masterpiece
Your Keto Cheesecake Dreams, Delivered Fast!

Keto Cheesecake In A Mug
Craving that rich, creamy, decadent cheesecake but sticking to your keto lifestyle? Look no further! This Keto Cheesecake In A Mug is your ultimate solution. It’s incredibly quick to make, requires minimal ingredients, and best of all, it satisfies that sweet tooth without derailing your macros. Imagin extracte a warm, gooey, perfectly sweet cheesecake ready in mere minutes, all from the convenience of your microwave. It’s the perfect single-serving dessert for when you need a little treat without the commitment of baking a whole pie. I love this recipe because it’s so forgiving and adaptable. Whether you’re a seasoned keto baker or just starting out, you’ll find this recipe incredibly easy to follow. Let’s dive into what you’ll need to create this delightful mug dessert.
Ingredients:
Instructions:
Step 1: Preparing the Base
The first and most crucial step is to ensure your cream cheese is properly softened. This is key to achieving a smooth, lump-free batter. If your cream cheese is still cold and firm, it will be much harder to incorporate everything smoothly, and you might end up with small pockets of cream cheese in your finished cheesecake. The best way to soften it is to leave it out at room temperature for about 30-60 minutes. If you’re in a hurry, you can gently microwave it for very short bursts (10-15 seconds at a time), being careful not to melt it. Once softened, place the cream cheese into a microwave-safe mug. A standard 10-12 ounce mug works perfectly. Make sure the mug is deep enough to allow for expansion during cooking.
Step 2: Mixing the Wet Ingredients and Sweetener
Next, add the softened cream cheese to your mug. Now, we’ll incorporate the sour cream. The sour cream adds an extra layer of tangin extractess and richness, contributing to that authentic cheesecake flavor profile. Add the 1/2 tablespoon of sour cream to the mug with the cream cheese. Then, it’s time for the sweetener. I prefer powdered monkfruit sweetener for this recipe because it dissolves beautifully and doesn’t leave a grainy texture, which is important for a smooth cheesecake. Add the 2 tablespoons of powdered monkfruit sweetener. If you’re using a different keto-friendly sweetener, make sure it’s in powdered or superfine form for the best results. Now, using a fork or a small whisk, vigorously mix these ingredients together directly in the mug. You want to combine them until they are as smooth and creamy as possible, with no visible lumps of cream cheese or sweetener granules. This might take a minute or two of dedicated stirring.
Step 3: Incorporating the Egg and Vanilla
Once you have a smooth, well-combined base of cream cheese, sour cream, and sweetener, it’s time to add the binder and flavor. Crack your room-temperature egg into the mug. Using a room-temperature egg is important because it emulsifies better with the other ingredients, creating a more cohesive batter. Cold eggs can sometimes cause the mixture to curdle slightly. Add the 1/4 teaspoon of vanilla extract. Vanilla is essential for that classic cheesecake aroma and taste, so don’t skip it! Now, whisk everything together again, but this time, be a little gentler. You want to incorporate the egg thoroughly without over-whipping the batter, as too much air can cause the cheesecake to puff up excessively and then collapse dramatically. Mix until the batter is uniform in color and consistency, ensuring there are no streaks of egg white or yolk visible. The batter should be smooth and pourable, but not too thin.
Step 4: Microwaving Your Cheesecake
This is where the magic happens! Place your mug in the microwave. The cooking time can vary significantly depending on the wattage of your microwave, so start with a conservative estimate. I recommend microwaving on high power for 60 to 90 seconds initially. You’ll know it’s done when the edges of the cheesecake appear set and slightly puffed, while the center might still look a little soft or “wobbly.” This is perfectly normal, as it will continue to cook and firm up as it cools. If after 90 seconds, it still looks very liquidy, continue microwaving in 15-second increments, checking after each interval, until it reaches the desired consistency. Be very careful not to overcook it, as this will result in a dry and rubbery cheesecake. The goal is a moist, tender dessert.
Step 5: Cooling and Enjoying
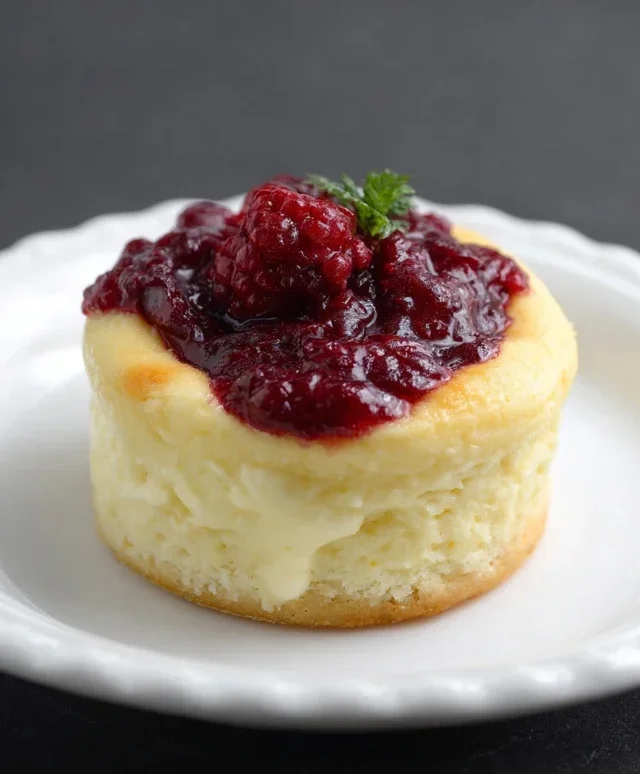
Once your keto cheesecake in a mug is cooked to perfection, carefully remove the hot mug from the microwave. Be sure to use oven mitts or a potholder as the mug will be hot. Let the cheesecake cool in the mug for about 5-10 minutes. This cooling period is vital for the cheesecake to fully set and for the flavors to meld. The center will firm up considerably during this time. You can enjoy it warm right out of the mug, or if you prefer a chilled cheesecake, allow it to cool completely and then pop it in the refrigerator for another 10-15 minutes. For an extra decadent touch, consider topping your keto cheesecake in a mug with a dollop of sugar-free whipped cream, a few fresh berries (like raspberries or blueberries, which are lower in carbs), or a sprinkle of chopped nuts. This simple, delicious, and satisfying dessert is your guilt-free indulgence.
Conclusion:
There you have it! My incredibly simple and utterly delicious Keto Cheesecake In a Mug recipe is your new best friend for satisfying those sweet cravings without derailing your low-carb lifestyle. The beauty of this recipe lies in its speed, simplicity, and the fact that it delivers all the creamy, decadent flavor of traditional cheesecake in a single, perfectly portioned serving. It’s so quick, you can whip it up in minutes, making it ideal for those moments when only cheesecake will do. Imagin extracte enjoying this warm, comforting dessert with a hot cup of coffee or tea – pure bliss!
I love serving my Keto Cheesecake In a Mug just as it is, perhaps with a dusting of cinnamon or a few fresh berries if I’m feeling fancy. For variations, feel free to experiment with different extracts like almond or lemon for a subtle twist. Some people enjoy adding a sprinkle of chopped nuts for a bit of crunch, or even a swirl of sugar-free chocolate syrup. The possibilities are truly endless, and the base recipe is so forgiving. I truly encourage you to give this Keto Cheesecake In a Mug a try. It’s a game-changer for anyone following a ketogenic diet and looking for a genuinely satisfying dessert.
Frequently Asked Questions about Keto Cheesecake In a Mug:
Can I make this ahead of time?
Absolutely! While it’s best enjoyed fresh and warm from the microwave, you can prepare the mixture ahead of time and store it in the refrigerator. However, you’ll need to microwave it to achieve the cheesecake texture. For the freshest taste and texture, I recommend making it right before you plan to eat it.
What if I don’t have a microwave?
No problem! You can adapt this recipe for an oven. Pour the mixture into a ramekin, cover it loosely with foil, and bake in a preheated oven at around 325°F (160°C) for about 15-20 minutes, or until the edges are set and the center is still slightly wobbly. Let it cool before enjoying.
Can I use a different sweetener?
Yes, you can. The recipe calls for a keto-friendly sweetener like erythritol or xylitol, but you can substitute it with other low-carb sweeteners like monk fruit or stevia. Adjust the amount to your personal taste, as sweetness levels can vary between different sweeteners.
Keto Cheesecake In a Mug
A quick and easy keto-friendly cheesecake made in a mug, perfect for a single-serving dessert.
Ingredients
-
3 1/2 tbsp cream cheese (softened, 52g)
-
1/2 tbsp sour cream (7g)
-
2 tbsp powdered monkfruit sweetener (20g)
-
1 egg (room temperature)
-
1/4 tsp vanilla extract
Instructions
-
Step 1
In a microwave-safe mug, combine the softened cream cheese and sour cream. Stir until smooth. -
Step 2
Add the powdered monkfruit sweetener and vanilla extract to the mug. Mix well. -
Step 3
Crack the egg into the mug and whisk until fully incorporated and the mixture is smooth. -
Step 4
Microwave on high for 60-90 seconds, or until the cheesecake is mostly set but still has a slight jiggle in the center. -
Step 5
Let the cheesecake cool in the mug for a few minutes before enjoying. You can add your favorite keto-friendly toppings.
Important Information
Nutrition Facts (Per Serving)
It is important to consider this information as approximate and not to use it as definitive health advice.
Allergy Information
Please check ingredients for potential allergens and consult a health professional if in doubt.