
Easy Taco Biscuit Cups Recipe-Flavorful & Fun
Taco Biscuit Cups are the ultimate weeknight dinner hero, and trust me, you’re going to want to add these to your regular rotation! Forget the messy taco shells and endless bowls of toppings; these delightful little parcels combine all your favorite taco flavors into one incredibly convenient and fun package. What’s not to love? They’re incredibly easy to make, perfect for picky eaters (and let’s be honest, busy adults too!), and endlessly customizable. The golden, flaky biscuit dough acts as the perfect edible vessel, holding a savory, seasoned taco meat filling and all your beloved fixings. Imagin extracte a bite-sized fiesta waiting to happen – that’s the magic of Taco Biscuit Cups. They’re a guaranteed crowd-pleaser and frankly, just pure comfort food bliss.
Why You’ll Adore These Taco Biscuit Cups
Get Ready for a Flavor Fiesta!
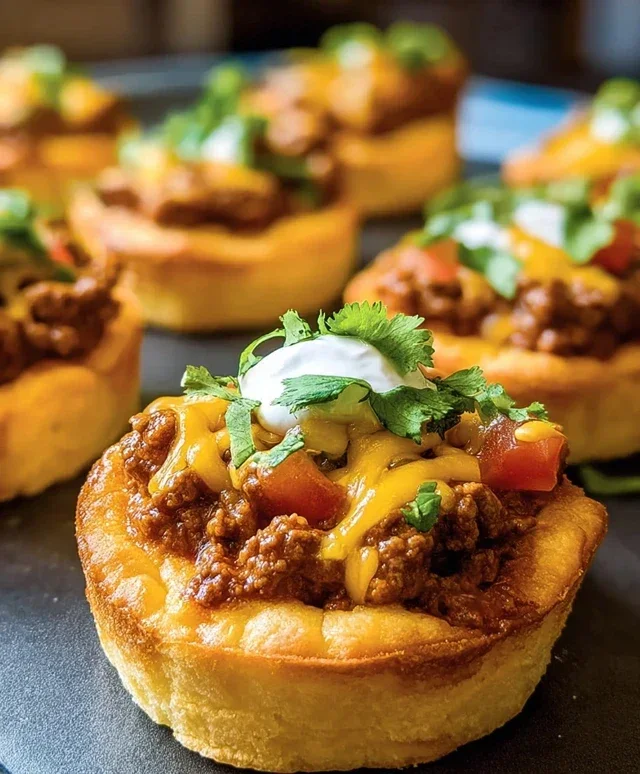
Taco Biscuit Cups
Get ready for a fun and flavorful weeknight meal that’s sure to be a hit with the whole family! These Taco Biscuit Cups are incredibly easy to make and offer all the deliciousness of tacos in a convenient, bite-sized package. They’re perfect for busy evenings, casual gatherings, or even as a fun lunchbox treat. The best part? You probably already have most of the ingredients in your pantry and fridge! We’re going to take simple refrigerated biscuits and transform them into edible cups that hold a savory, seasoned ground beef filling, all topped off with melty cheddar cheese. Let’s get cooking!
Ingredients:
Preparing the Taco Meat Filling
The foundation of our delicious Taco Biscuit Cups is a flavorful taco meat. We’ll start by browning the ground beef, breaking it up into small pieces as it cooks. This ensures even cooking and a great texture for our filling. Once the beef is no longer pink, we’ll drain off any excess grease. This step is important for a cleaner-tasting filling and to prevent the biscuit cups from becoming greasy.
Next, we’ll introduce the flavor! We’ll pour in the water and sprinkle in the entire packet of taco seasoning. Stir everything together until the seasoning is well combined with the beef and water. Bring the mixture to a simmer and let it cook for about 5-7 minutes, stirring occasionally. This allows the flavors to meld beautifully and the sauce to thicken slightly, creating a rich and savory taco filling. If you’re using cilantro, this is the perfect time to stir it in. Its fresh, bright flavor adds a wonderful aromatic lift to the taco meat.
Assembling the Biscuit Cups
Now for the fun part – transforming those biscuits! We’ll preheat our oven to 375 degrees Fahrenheit (190 degrees Celsius). While the oven is heating up, we’ll lightly grease a muffin tin. This will prevent the biscuit cups from sticking and make them easy to remove once they’re baked to golden perfection.
Open your can of refrigerated biscuits. You’ll notice they are pre-cut. We’re going to take each biscuit and gently flatten it out a bit with your hands. Don’t worry about making them perfectly round; a slightly uneven shape is part of their charm! Then, carefully press each flattened biscuit into the cups of your prepared muffin tin, pressing it down so it lines the bottom and sides. You want to create a little cup or bowl shape. If the biscuit seems a bit too thick, you can gently stretch it a little further to ensure it lines the entire muffin cup without any holes.
Filling and Baking
Once your muffin tin is lined with all the biscuit dough, it’s time to add the delicious taco meat filling. Spoon a generous amount of the seasoned ground beef mixture into each biscuit cup. Don’t be shy; fill them up! This is what makes them so satisfying.
After filling, it’s time for that glorious cheese! Sprinkle a good amount of shredded cheddar cheese over the top of the taco meat in each cup. The cheese will melt beautifully in the oven, creating a gooey, irresistible topping that binds everything together.
Now, carefully place the muffin tin into your preheated oven. Bake for approximately 15-20 minutes, or until the biscuit edges are golden brown and the cheese is melted and bubbly. Keep an eye on them, as oven temperatures can vary. You’re looking for that perfect golden-brown hue on the biscuit, indicating they are fully cooked and slightly crispy.
Cooling and Serving
Once your Taco Biscuit Cups are out of the oven, let them cool in the muffin tin for a few minutes. This allows them to set up slightly and makes them easier to remove. Carefully run a knife or a small spatula around the edge of each cup to loosen them, then gently lift them out of the muffin tin.
Serve your Taco Biscuit Cups warm. They are fantastic on their own, but you can also offer a variety of your favorite taco toppings to customize them! Think shredded lettuce, diced tomatoes, a dollop of sour cream, a sprinkle of extra cilantro, or even some hot sauce for those who like a little kick. These are so versatile and always a crowd-pleaser. Enjoy this simple yet incredibly satisfying meal!

Conclusion:
And there you have it – a recipe for Taco Biscuit Cups that’s as fun to make as it is to eat! These delightful little cups are a fantastic weeknight meal solution, offering a perfect balance of savory taco flavors encased in a fluffy, golden biscuit. They’re incredibly versatile, making them a guaranteed hit with both kids and adults alike. We’ve covered everything from the simple steps to some exciting ways to customize your creations. Whether you’re looking for a quick and easy dinner, a unique appetizer for your next gathering, or just a delicious way to spice up your meal routine, these taco biscuit cups are an absolute winner.
Don’t hesitate to get creative with your fillings and toppings! The beauty of this recipe lies in its adaptability. Serve them up with your favorite taco fixings like shredded lettuce, diced tomatoes, sour cream, salsa, or a dollop of guacamole for a complete taco experience. For variations, consider using different types of ground meat, adding black beans or corn to the filling, or even topping them with a sprinkle of cheese before baking. I truly encourage you to give these Taco Biscuit Cups a try – you won’t be disappointed!
Frequently Asked Questions about Taco Biscuit Cups:
Can I make the taco filling ahead of time?
Absolutely! You can prepare the taco meat filling up to two days in advance and store it in an airtight container in the refrigerator. This will save you even more time when you’re ready to assemble and bake your taco biscuit cups.
What kind of biscuits work best?
Most refrigerated biscuit doughs will work well. Whether you prefer flaky layers or buttery layers, they will both bake up beautifully around the taco filling. Just follow the package instructions for best results.
Can I freeze leftover Taco Biscuit Cups?
Yes, you can freeze fully baked and cooled taco biscuit cups. To reheat, place them on a baking sheet and warm them in a 350°F (175°C) oven for about 10-15 minutes, or until heated through. They might not be quite as crisp as fresh, but they’re still delicious!
Taco Biscuit Cups
Easy and delicious taco biscuit cups featuring seasoned ground beef, cheese, and a flaky biscuit crust. Perfect for a quick weeknight meal or appetizer.
Ingredients
-
1 pound lean ground pork
-
1 ounce packet taco seasoning
-
¾ cup water
-
2 Tablespoons fresh chopped cilantro (optional)
-
12 ounce can refrigerated biscuits
-
1 cup shredded cheddar cheese
Instructions
-
Step 1
Preheat oven to 375°F (190°C). Grease a 12-cup muffin tin. -
Step 2
In a skillet over medium heat, cook the ground pork until browned. Drain off any excess grease. -
Step 3
Stir in the taco seasoning and water. Bring to a simmer and cook for 2-3 minutes, or until the sauce has thickened. -
Step 4
If using, stir in the fresh chopped cilantro. -
Step 5
Separate the refrigerated biscuits and press each biscuit into the cups of the prepared muffin tin, creating a “cup” shape. -
Step 6
Spoon the ground pork mixture evenly into each biscuit cup. -
Step 7
Top each cup with shredded cheddar cheese. -
Step 8
Bake for 15-20 minutes, or until the biscuits are golden brown and the cheese is melted and bubbly. -
Step 9
Let cool slightly before serving. Garnish with additional cilantro if desired.
Important Information
Nutrition Facts (Per Serving)
It is important to consider this information as approximate and not to use it as definitive health advice.
Allergy Information
Please check ingredients for potential allergens and consult a health professional if in doubt.


